Go to add printer
Select Generic manfacture and printer Generic text only
Go to printer and fax
Click on File menu button
Click on server properties
Click on blank box(create a new form)
Type form name as PASSBOOK and give Form description as follows:
Paper size Printer are margin
Width 8.27in Left0.08in Top.0.98in
Height. 5.3in Right.0.00in Bottom.0.08in
click on 'Save form' button then apply ok button>
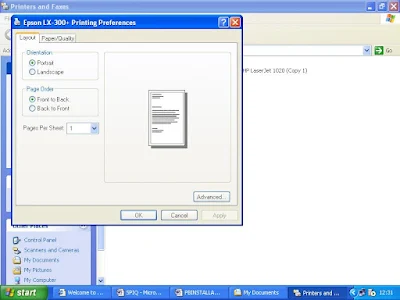
then right click On passbook printer>printing preferences>Advanced>Paper size> select the form PASSBOOK
Steps for Printer Setup
1. Press both station 2 and power on button at a time wait for few seconds ready power button will on with green light then insert A4 size paper take existing Printer set up compare with and check each one and mark out where the Changes are required in manually.2. Now press both station1 ,station2 and power on button after few seconds insert paper. It asks to press Local button for continue.
3. Menu config will come then press station 1 button, just go on pressing station1 Button wherever the changes required just press station 2 button.
4. After completion of the changes press Local button to save the parameter.
5. Now press Power off the button .
6. Now you will be able get proper printing.
Screenshots of the Setup
Click create a new form box ,give form name as PASSBOOK or any name, give paper size shown above, click on save form button
click on advanced menu
select the paper size form PASSBOOK then click on ok button
on the request of Veerendra S Porapur, System Administrator, Ranebennur MDG


No comments:
Post a Comment